
first up on the super cute train... the city clutch...
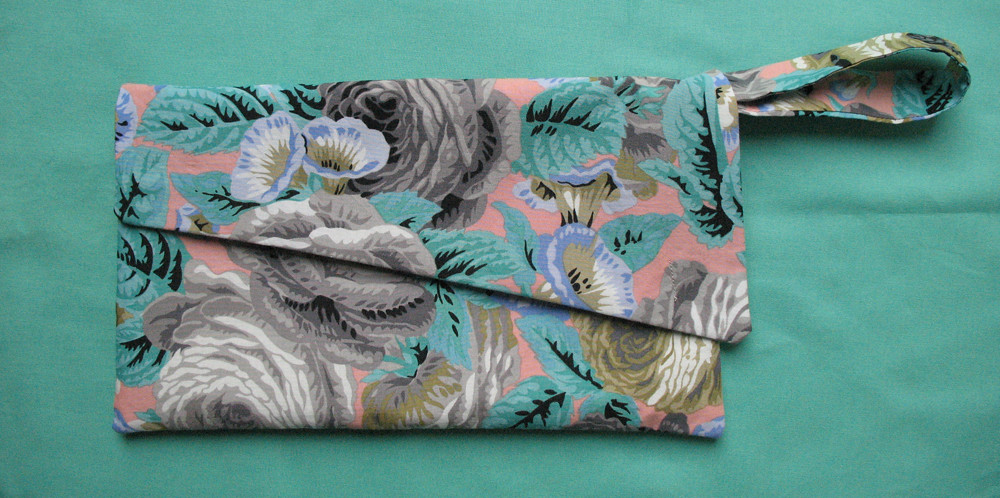
the city clutch is a quick and easy project, using less than half a yard of two fabrics. it was inspired by, well, wanting a cute little bag for when all you need is your phone, wallet, and keys. it stemmed from a bag that my friend had for years and years (and maybe still does) that she uses for every occasion.
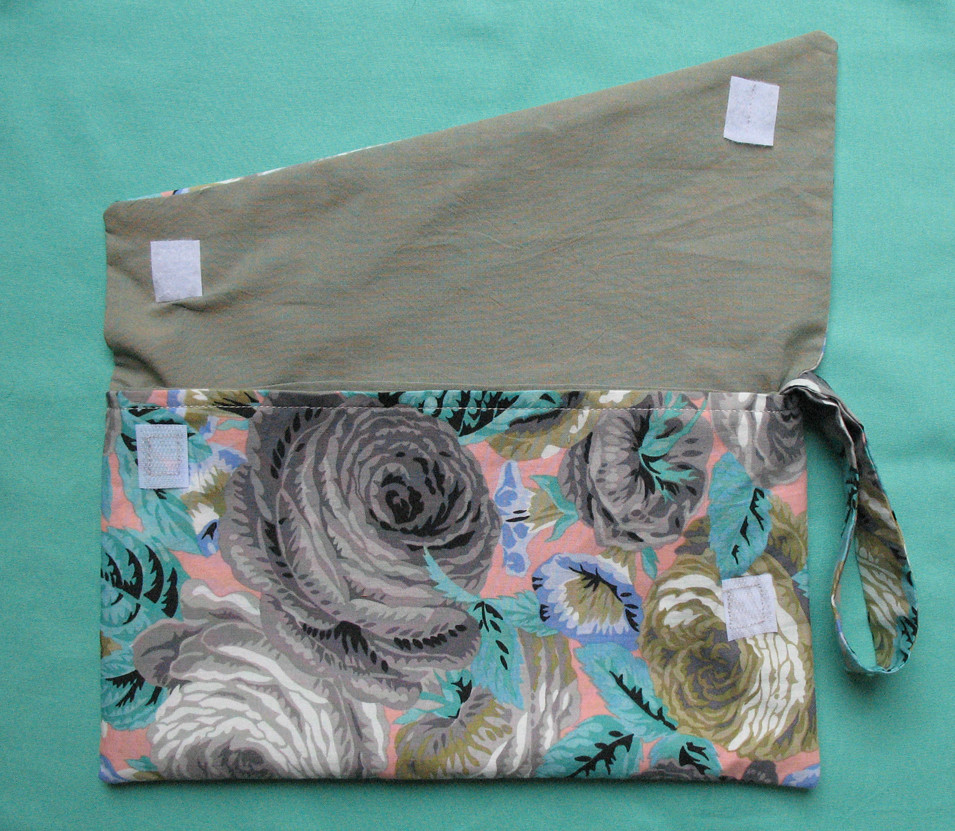
the flap is held down with two easy pieces of velcro. did i feel like getting into zippers, eh, not this time. it's an easy breezy kinda thing, you dig, and velcro is definitely easy peasy lemon squeezey!
so how do you do it you may ask...start by cutting some rectangles...
exterior:
2 at 7"x12"
1 at 8"x12"
1 at 2.5" x 12"
lining:
2 at 7"x12"
1 at 8"x12"

start by creating the flap for the bag... fold over at a 30 degree-ish angle to create the look you want... i just kind of eye ball it so that the flap is angled, yet long enough for my liking...

you then want to apply your velcro to the lining piece on the right side. position it in the corners, giving yourself at least an inch from the edges. stitch it in place...

now you want to go ahead and sew the two angled pieces together, with right sides facing along the two short sides and the angled side... clip the corners and turn right side out...
once you've done this it's time to place and stitch the other sides of velcro to the front piece of the bag. over lay the flap piece with about 1/4 hanging from the top edge and align your velcro where the flap velcro lays. stitch in place...

now you can go ahead and stitch the front and back of the exterior together, right sides facing along the two short sides and bottom... (don't forget to clip the corners!)
repeat with the interior lining pieces.

now you can go ahead and turn the exterior bag right side out...
fold over and press a 1/4 inch inward, creating a clean edge around the top of the pouch. repeat with the lining, folding towards the wrong side of the fabric. this will allow you to insert the lining inside the bag with clean edges matching along the top...

now it's time to create the handle strap... take the 2.5"x12" strip, fold it in half, wrong side out, lengthwise, and stitch raw edges at a 1/4" seam allowance. then turn right side out and press...
now you should have four pieces, it's time to attach them all!
start by inserting the raw edges of the handle in the side of the bag, right along the side seam. pin in place. also pin the front top edges, matching the lining and exterior. insert the back flap as shown, 1/4" with the lining showing as seen...

stitch into place all the way around using a 1/4" seam allowance. guess what, you're done! yay!

super cute!
No comments:
Post a Comment